Hello there!
You’re of course aware just how much importance I attach to interior design and decoration. It’s now been five years since I bought my flat, five years in which I’ve been asking myself every day when I’m going to spend some time redesigning my kitchen. Finally, the moment came to stop procrastinating and start thinking about renovating what was such a badly arranged and, for my tastes, somewhat old-fashioned kitchen!
So where to begin?
I began by first collecting together a few style, colour, decoration and kitchen design ideas by browsing the web and looking at everything from home decoration blogs to design agency websites, to get a precise idea of the kind of feel and ambiance I wanted for my kitchen. I opted for a chic industrial style: I thought the raw, authentic aspect was essential for a room like the kitchen, and I really liked the idea of using the chic and trendy industrial look as a way of adding an aspect of refined elegance to my own kitchen. I therefore chose:
The choice of materials
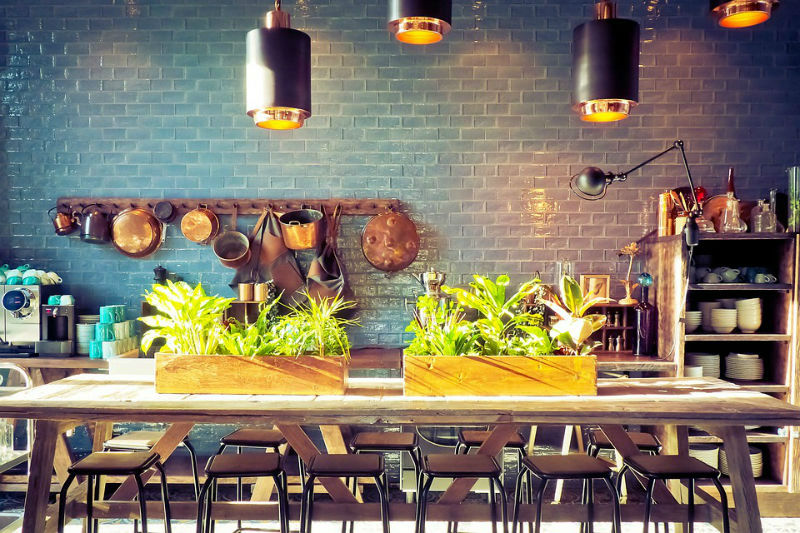
Metal! Essential if you want an industrial type style. I went for two metal ceiling lights to set above the dining table. Wood, another essential. I opted for a table in pine and metal and stools made from the same materials. I also chose this type of wood for the flooring, opting for a light coloured parquet finish. Though brick walls are a must when it comes to adding an authentically industrial touch to a room, I instead went for attractive glazed brick-effect tiling in blue to achieve a more sophisticated look. I also opted for an aesthetically appealing and hard-wearing sink in granite.
The choice of colours
I went for sober colours, exclusively black for the kitchen furniture and electrical appliances and a few touches of brown and yellow for the accessories. I ended up leaning towards industrial blue for the walls, which matches the other colours I chose perfectly.
The major stage: carrying out the work
My guy and I not being great DIYers, we decided to call on the services of a professional when it came to tackling the actual work involved. After discussing our plans and what we wanted with him, he gave us an estimate that we considered definitely affordable within the constraints of our budget. The work began two weeks later, and it would take another five days before we could begin enjoying the final results… five days of noise and dust, and, in particular, three days with no access to the kitchen; though in view of the final results, it was definitely all worth it!
My overall feelings and my tips and advice
I’m really very satisfied with the results. I love the combination of both minimalism and authenticity this style provides. I finally feel comfortable and at home in my kitchen, and I’ve added more storage space, thus making it more practical and functional. I advise you to first think carefully about what budget you can afford before you get started; I also think it’s essential to really know your home well.
In the end, waiting and not rushing before starting the work gave me the chance to properly analyse and consider what I wanted and what features my kitchen lacked. Think carefully about the style and colours you want. Opt for something that really matches who you are and that you’ll be happy with for a long time to come! If you need inspiration or require help with the architecture and design of the room you’re renovating, consider getting the help of professionals: there are agencies that specialise in interior design, such as Luxoria, who will manage your project from start to end for you.
So there you have it! I hope my tips and advice will prove helpful, and I’ll be back very soon with a new article. Bye till next time!